Wednesday, May 30, 2012

Kindle Fire Cover Tutorial

I just recently upgraded to a Kindle Fire from my old Kindle 2. I love it, but I really didn't want to spend $30 or more for a  cover that I *kind of* like. So I thought I would make my own. I wanted something that opened like a book, didn't have elastic everywhere to hold it in place, and that could be secured shut. I also wanted pockets to hold things...a paper here, screen wipe there. Most importantly, I wanted it to be semi-stiff, so that it would offer more protection. Since there are no Fire Cover tutorials yet, I combined features from a couple of regular Kindle cover tutorials and added my own twist as well. The two tutorials I referenced can be found at Skip To My Lou and Dixie Mango.

All seam allowances are 1/4" unless otherwise noted (and, as always, Top Stitching is as close to the edge as possible)
-----------------------------------------------------------------------------------------------------------------------------

Kindle Fire Cover

Supplies
  • 1/2 yard Main Fabric
  • 1/2 yard Contrast Fabric
  • 5/8 yard Fusible Peltex
  • 5/8 yard Fusible Fleece
  • Small amount 3/4" sewable velcro
  • embellishments, if desired (a button for the strap, for example)
  • Pressing Cloth
  • Matching Thread
  • Iron
Construction

Step 1: Cut out your materials
              You will need to make the following cuts. You will end up with 21 pieces.
              From the Main Fabric:
                          -2 cuts 12 1/2" X 9 1/4"
                          -2 cuts 3 1/2" X 9 1/4"
                          -1 cut 2 1/2" X 6"
              From the Contrast Fabric
                          -2 cuts 8 1/4" X 5 5/8"
                          -2 cuts 4 1/2" X 9 1/4"
                          -4 cuts 2" X 2"
                          -1 cut 2 1/2" X 6"
               From the Peltex
                          -4 cuts 8 " X 5 1/2"
               From the Fusible Fleece
                          -1 cut 12 1/2" X 9 1/4"
                          -1 cut 2 1/2" X 6"
               From the velcro
                          -1 cut 1 3/4" long

Step 2: Fuse your pieces
             Fuse the 12 1/2" X 9 1/4" piece of Fleece to one piece of Main Fabric that is the same size. This will be the outside of the cover. 
             Fuse the 2 1/2" X 6" piece of Fleece to the piece of Main Fabric OR  the Contrast Fabric that is the same size. Choose the fabric that you want on the outside of the strap. 
             Fuse 2 pieces of Peltex together. Repeat with the other 2 pieces of Peltex.
Step 3: Prepare your strap.
Attach your piece of velcro to one end of the LINING portion of the strap (the piece that won't show when the cover is closed. I usually attach the "rough" side of the velcro to the strap. With wrong sides together, take the 2 1/2" X 6" pieces of Main and Contrast Fabric (one will have the fleece fused to it) and make sure your raw edges line up. Sew around 3 of the edges, making sure that one of the edges is the one with the velcro. Turn. 


Step 4: Prepare the Kindle "Pocket"
              Fold your 4 2" X 2" squares in half, forming triangles, right side out. Press. If you want, top stitch along the crease. Place them at the corners of your first 8 1/4" X 5 5/8" contrast piece (on the right side of the fabric, with the squared corners of the triangle at the corners of the fabric (see photo). Place second 8 1/4" X 5 5/8" contrast piece on top, right side down, matching raw edges. Pin in place, making sure you keep the triangles in place.
             

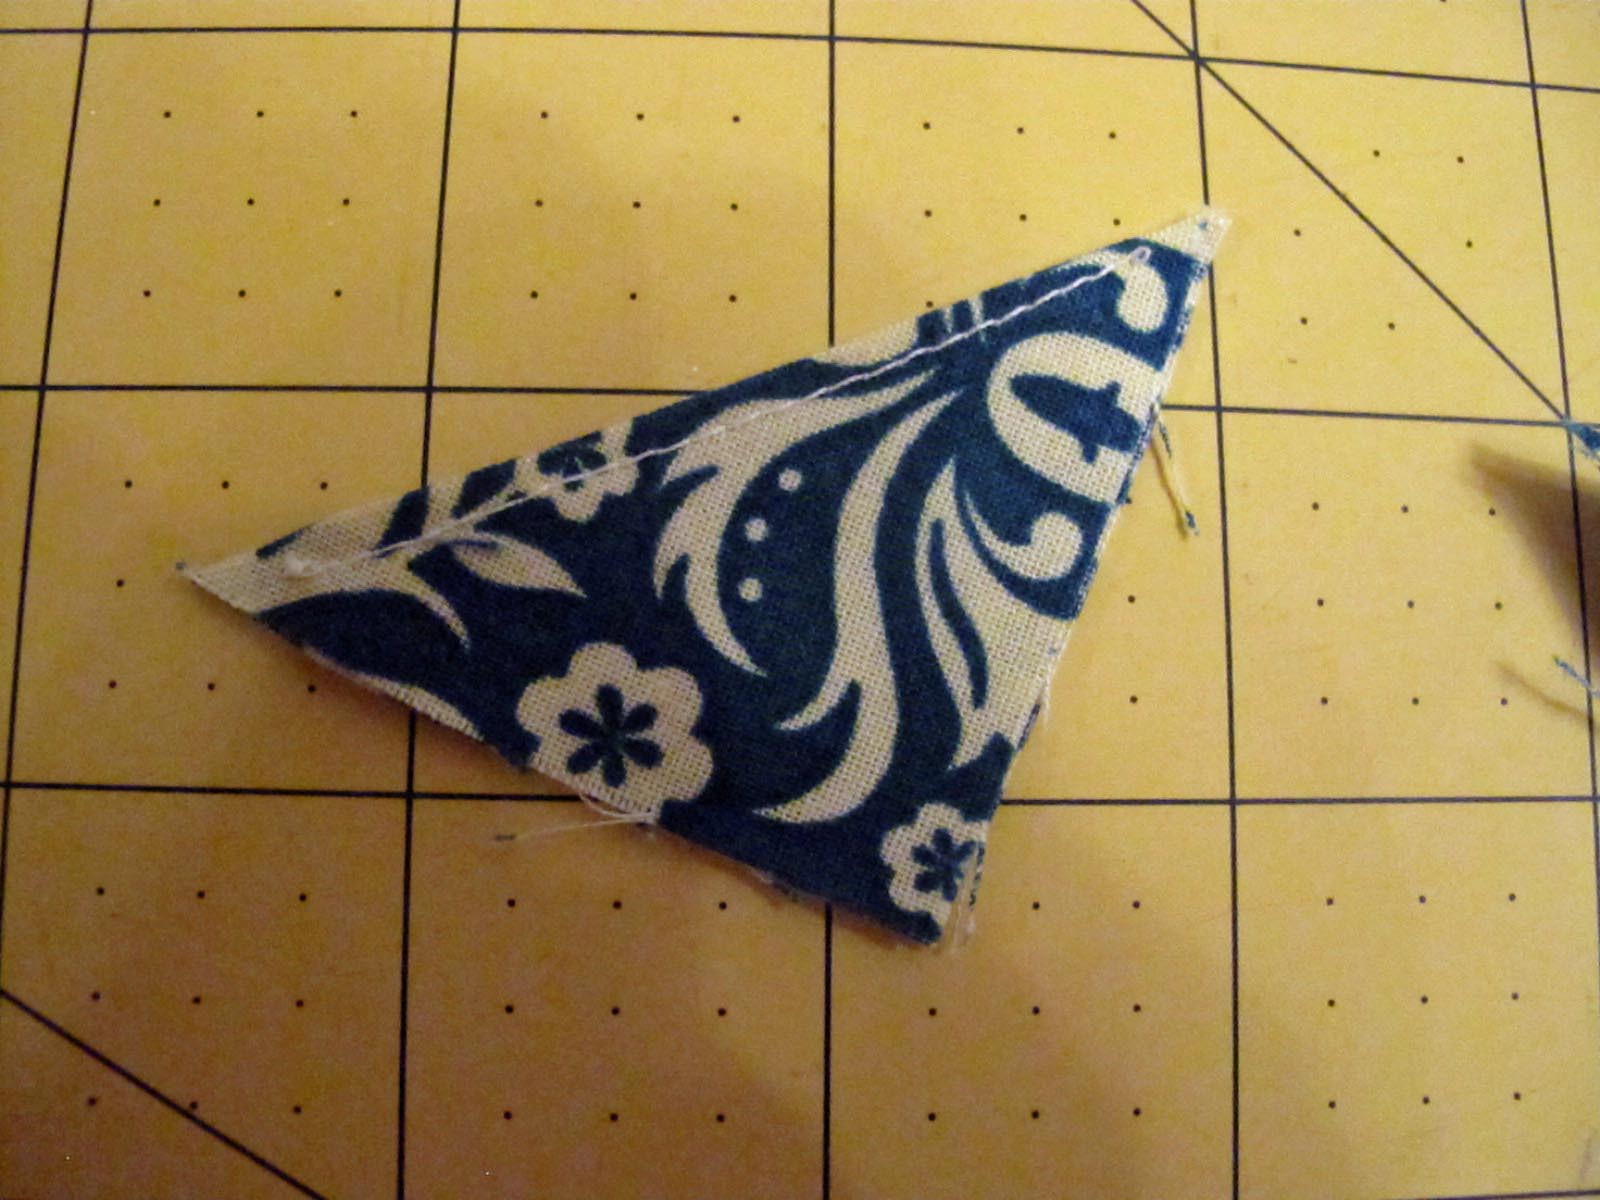
Sew around perimeter twice for security, leaving a gap for turning. Clip corners and turn, poking corners out. Turn raw edges in and press...now make sure your Kindle Fire fits!

*Note: I had to sew closer to the edge than the 1/4" seam allowance I use in every other step. It is easier to make the pocket smaller than it is to make it bigger, so start out by stitching fairly close to the outer edge (1/8" if possible) and if you need to sew around further in, you can.
Step 5: Preparing the other "Pockets"
               Take your two 3 1/2" X 9 1/4" Main Fabric pieces and place them right sides together. Stitch along ONE of the long edges. Turn right side out, and press. Topstitch. This edge will be the edge of the pocket that shows (that forms the opening to the pocket). Repeat with the two 4 1/2" X 9 1/4" Contrast Pieces. Place the Main Fabric pocket onto the Contrast pocket, matching raw edges. Pin. Find the horizontal center of the pockets, and create 2 Main Fabric Pockets by sewing a seam in the center of the Main Fabric piece only. (see photo)

Step 6: Place the other piece of velcro
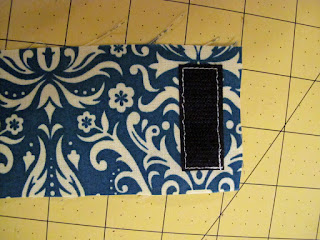
                Fold the main panel of the cover (the one with the fusible fleece) in half lengthwise, so that the 12 1/2" edges line up. Fold your strap in half lengthwise as well. Open both. Match the center creases, and lay the strap onto the right side of the fabric on the RIGHT HAND EDGE (see photo). With a fabric marking pencil, mark the cover where the end of the strap hits (aka where the velcro is). Fold your second (soft) piece of velcro in half so that it forms a square. Measure 1 1/4 inches to the right of the line you drew, and place your velcro, making sure to line it up with the center crease on the cover. Sew in place.
*Note: I had a hard time describing this step...if it is confusing please let me know and I will try to help. 
Step 6: Place the Kindle "Pocket" onto the interior panel
                 Fold the interior Main Fabric Panel (the one without the fleece) in half, right sides together, so that it measures 12 1/4" X 9 1/4". Finger press the fold to mark the center, so it opens like a book. Open. Now center the Kindle pocket on the right hand side of the crease, on the right side of the fabric. Pin.


                 Stitch the pocket in place, on the straight edges only, not the corners. You want the corner pieces to be a bit free so that you can get the Kindle in and out.
Step 7: Place the other "Pockets" onto the interior panel.
                  Matching Raw edges, place the prepared "pockets" onto the left hand side of the Main Fabric Interior Panel. Pin. Baste around raw edges to hold in place.

Step 8: Putting it all together
                   To place your strap, place the prepared interior panel onto the prepared exterior panel, making sure that the left hand side of the interior panel (with the 3 pockets) is on the same side as the velcro on the exterior (see photo). Fold like a book, with the velcro side of the exterior panel on top. Line up the velcro on the exterior with the velcro of the interior (matching raw edges). CAREFULLY detach the velcro, making sure to keep the raw edges in place. Lay the strap down on the side of the cover, with the raw edges where you had them lined up. Now, you want the strap to lie along the BACK of the exterior panel, so you will pinch the raw edges together, holding the strap in place, but flipping the entire cover (See picture, that's confusing). Pin the strap to the EXTERIOR panel only, but pin it from the WRONG side of the panel.

                    Now, with strap still pinned, flip so that the right sides of the interior and exterior panels are facing, with raw edges matching. Make sure that the side of the exterior panel that has the strap on it is on top of the Interior Panel side with the Kindle Pocket.


                    Stitch around edges, leaving a 6" opening at the bottom for turning (and to insert your peltex panels). Turn & Press.

Step 9: Finishing
                  Insert your peltex panels, 1 at a time, placing one on each side of the "book." Turn the raw edges at the bottom to the inside, and Top Stitch around entire perimeter of Cover.

                  With your fingers, find the gap that is between the two Peltex panels. Sew a seam in between the two...it will help keep them in place as well as help the cover to fold.

                   If you are adding an embellishment on the strap, do it now. Insert your Kindle Fire and make sure that the strap "latches" when the fire is in place. If not, take out the piece of soft Velcro that is on the main body of the cover, re-position, and hand sew in place. You won't be able to sew through the Peltex, but if you take your time you can hook the needle through the fabric and fleece and get it on there...trust me, I had to do it!

That's it, You're done!!!


post signature

Wednesday, May 16, 2012

Bun Shaper (AKA Chignon Cushion/Foundation) Tutorial

I was looking for hairstyles that I could do myself for an upcoming military ball, but I was having problems finding things that A) I could do myself AND B) didn't look really messy or flat. Then I found a great trick that I had never heard of before...a bun shaper. If you go to a beauty supply store, these will usually cost $3-$4 plus tax. Not a lot, I know, but why spend the money when you can make one with things you already have in your house?

A store-bought bun shaper looks like this:
And with one you can do hairstyles like this: 


So, let's get to it.

Supplies:

Tube Sock
Nylons
Scissors
Thread 
Needle

Step 1: Cut toe off of sock and a section of nylon (with both ends cut off) approximately 3" long.

Step 2: Roll the sock all the way down to form a donut.
Step 4: Insert tube of nylon into the center of the donut.
Step 5: Wrap the nylon around the donut so that the two cut edges touch around the inside.
Step 6: Whipstitch the raw edges of the nylon together.
Step 7: Put the seam on the inside of the donut (so the entire outer section is smooth) and you're done!


post signature

Wednesday, May 2, 2012

Swiffer Sweeper Reusable Pad Tutorial

Can I just say that I love my Swiffer Sweeper Vac? Seriously....LOVE it. However, what I do not love is the cost of those god forsaken...murtherfrickin one use only pads that you are supposed to use with it. Seriously, I do not want to pay almost $10 every time I need a box of refills. That just makes me angry. After searching online for a way to make my own pads (and there are several great tutorials out there) I decided to make my own. Not because the others don't work, I'm sure they do. But most of them involved socks (just a no for me), old T-shirts (we don't have any that we don't wear) or crocheting/knitting a pad (I don't want my cleaning pad to have holes in it, thank you). Sorry that the pictures are a little hard to see detail on, I only had black terry cloth for use on this project! So here it is, my version. Enjoy!
---------------------------------------------------------------------------------------

Supplies:
  • 16" X 5 1/2" piece of terry cloth
  • Sewing machine


Construction:
Step 1: Fold the short ends in 2 3/4"
Step 2: Using a serger OR a zig zag stitch (with one end of the stitch going off the fabric and one catching the fabric) stitch down the length of the pad, sewing the folded ends in place. I used a shorter stitch length since terry cloth tends to "shed" once it's been cut. By using a serger or zig zag stitch it will help prevent this from happening.
Note: double check that your ends are secured...if not do a quick straight stitch close to the zig zag stitch to make sure it's going to stay in place.
Step 3: Turn so that the raw edges of the turned ends are inside the pocket.

Step 4: Top stitch along the length of the pad to make sure everything looks OK and is really held in place. Note: If you want, fold the edges that are not caught by the folded edge in 1/4" and top stitch them in place. It's not necessary and is purely cosmetic, but it is one option to make the pad look more "finished."
That's it! It will be slightly baggy on your swiffer, but will lie flat when you place it on the ground. It has to be a little loose so that you can fit it over the ends. 


post signature

Wednesday, April 25, 2012

Coming Soon: May 2012 Edition


May 2, 2012: Reusable Swiffer Sweeper Pad Tutorial


May 16, 2012: Bun Shaper Tutorial


May 30, 2012: Kindle Fire Cover Tutorial
post signature

Wednesday, April 18, 2012

Bottle Holder Tutorial

When I came across a tutorial for a bottle holder on Small Fry & Co's Blog, I was super exited. The tutorial is easy to follow, and since (at the time I wrote this) my son was finally learning to hold his own bottle, this will prevent lost bottles, milk all over the car, etc. There were a couple of things I wanted to change though, so I have re-written the tutorial with those changes. Hope you like it!
-----------------------------------------------------------------------------------------

Bottle Holder

Supplies:
  • 1 piece of fabric 3" X 26" (or shorter, I personally think this may be a bit long, but hey, it works)
  • 1 cord stop
  • 1 piece of cord 12" long
  • 1 section of 3/4" velcro 1" long
Step 1: Fold your fabric lengthwise, right sides together. Press
Step 2: Sew along long raw edge. Turn.
Step 3: Turn raw edges of ends inward 1/2". Press
Step 4: Insert ends of cord into one end approximately 1/2".

Step 5: Top stitch around entire edge of strap. I also used a zig zag stitch over where the cord was inserted to ensure the cord was secured.
Step 5: Take "rough" section of velcro and sew it on the end of the strap opposite where you inserted the cord.

Step 6: Sew the "soft" section of velcro 4" up from the end of the strap, on the same side as the "rough" section.

Step 7: Install the cord stop. This can be tricky. I threaded a needle, looped the thread around the cord, and threaded the needle again with the same thread. Then I inserted the needle through the cord stop and PULLED (while holding the stop open). It was tough, but once the cord started coming through it worked great!

That's it...easy peasy, took me about 15 minutes to whip this up. And now I don't have to worry about my little man hitting me in the head with his bottle while I'm driving!

post signature

Wednesday, April 4, 2012

I Made My First "Big Girl" Clothes!

I'm in love with this skirt. No, seriously. It's comfortable, warm for winter, and cute! What more could I ask for?

The original tutorial is at the following link: Knit Skirt Tutorial

Just one thing: when you add the ruffles, be careful. When I went by the tutorial, I ended up with "wings" because the layers ended in points on the side. I had to go through and re-hem each side to make the ruffles rounded instead of pointed. It looked like I had 3 sets of wings without doing that! 

I also used a heavier knit material than the tutorial writer did (apparently), since my skirt holds its form more than the one pictured on that blog did. That's OK, it actually fits my personality better. 

Don't be afraid to try on the skirt before you add on the waistband/ruffles...I ended up taking mine in about 2 inches to get it to fit correctly! Remember that knits stretch, so unless the skirt you use to make your pattern is a stretchy skirt, you will most likely have to make this one smaller. Skirts that have zippers are a little wider than stretchy skirts, since they don't stretch over your body and conform to it. I used a zippered skirt for my pattern and didn't even think about that, thus creating more work for myself!

post signature