------------------------------------------------------------
Sewing Machine Pin Cushion
Up to 6 coordinating fabrics (you need 2 3X3 squares of 5 of the fabrics, and enough of the 6th to cover a button and to have a 3" strip that wraps around the point of your machine where you want to attach the pincushion)
1 shaft button (1/2"-1" in diameter)
Poly fill stuffing
Thread
Sewing Machine
Measuring tape
Turning Tool
Needle
scissors/rotary cutter and mat
Iron and Ironing board
Hot glue gun and glue stick
Velcro (3/4" square. I used adhesive Velcro, and then top stitched)
Embroidery Thread
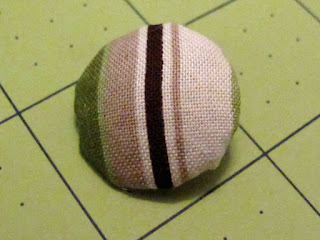
Covering the Button
Step 1: Cut a 2X2 square of the fabric that you have the most of & lay the button right side down onto the wrong side of the fabric.
Step 2: Hot Glue the four corners of the fabric to the back side of the button
Step 3: You will now see four points created from folding the corners in. Carefully place a dot of hot glue near the edge of the button and fold the points down to the glue, holding them in place.(No, the back isn't pretty, but the front looks good, I promise!)
The Straps
Step 1: Measure around the part of the sewing machine where you want your pincushion to go. From here you have 2 options: Option 1 is to cut that measurement in half, add an inch to that measurement, and cut your straps that are 3" wide and however many inches long. For example: my machine's body measured 22", so I cut 2 straps that were 3"w X 12"l. Option 2 is to cut one long strap that is 3"w and one inch longer than the measurement. Had I done this method, I would have cut one strap that was 3"w X 23"l.
Step 2: Fold each strap in half lengthwise, right sides together. Press.
Step 3: Sew a seam 1/2" from raw edges of one short edge and the long edge. Clip your corners, being careful not to cut into your seam.
Step 4: Turn your straps, using a turning tool (a knitting needle also works well) to help push out your corners.
Step 5: Turn the raw edges of the open end of the strap 1/2" in to the inside of the strap. Top stitch around all 4 sides of the strap.
The Pincushion
Step 1: Out of your remaining 5 fabrics (or however many you choose) cut 2 3"X3" squares out of each. You need to end up with 5 3"X3" squares.
Step 2: Using your cutting mat to help, Cut two of the corners off of each square sot hat from point to point is 4" and from clipped corner to clipped corner is 3".
Step 4: Cut each square so that from each original corner left, the line goes to the center point of the clipped edge on each side. You will end up with a diamond that is 4"X3". (See picture)
Step 5: Right sides together, take 2 of the diamonds and sew a 1/2" seam along ONE edge. Continue doing this with 3 more diamonds, sewing all together in a circle and joining the first diamond to the last. This means that all points should be joined in the center, and each diamond should have 2 adjacent sides sewn to 2 different diamonds. (It should look like the picture when right side up). Repeat with remaining 5 diamonds. These will create the two sides of your pincushion.
Step 6: Attach your strap by sewing it (or them) to the RIGHT side of ONE of your stars.
Step 7: Right sides together, sew around the perimeter of the star (1/2" seam), leaving ONE section open for turning.
Step 8: Turn right side out, using turning tool to ease out points.
Step 9: Stuff your star to your liking with the poly fill. Be careful not to over stuff and pull you seams too tight, but you want it stuffed enough so that it is an effective pincushion.
Step 10: Using needle and thread, slip stitch your remaining raw edge closed, turning raw edges to the interior to hide them.
Step 11: Attach your Velcro. I used pre-cut squares of adhesive Velcro and then top stitched them in place. Sew one side on the end of a strap, and then place your pincushion as it will go on your machine. Then place your second square so that the two line up. If your second strap is too long, attach your Velcro and then clip the end of the strap, leaving enough length to turn the raw edges inward and top stitch them in place. (I had to make that adjustment).
Step 12: Using your needle, thread all strands of your embroidery thread. You will need one LONG continuous strand. From back to front, stitch through the center and then out (always going all the way through the pincushion) along all seams. I would do a stitch, leave a space, then another stitch. I would catch the spaces I left on my way back to center on each seam. Make sure you end by again coming through the center from back to front.
Step 13: Using remaining embroidery thread, attach your button securely to the center of the pincushion. You're done! Strap that baby on the machine and you'll have a convenient, close place to stick your pins.
Enjoy!


No comments:
Post a Comment