--------------------------------------------------------------
Supplies:
-Patterned fabric to run 1" longer than the desired length for your runner (for example, for this runner I wanted it to be 55" long, so I needed 56". I bought 1 5/8 yards.
-Same amount in corresponding fabric for backing and side panels (your runner will NOT be the width of the fabric, so you'll have plenty).
-Thread
-2 Packs DMC Embroidery Floss
-Cutting Mat & Rotary Cutter (unless you really want to cut all of this by hand)
-Measuring tape or ruler/straight edge
-Sewing Machine
Step 1: Cut your Fabrics. The patterned fabric panel should be 56"x13". The backing panel should be 56"x17", and the two side panels should be 56"x3".
Step 2: Attach side panels to main patterned panel. With right sides together, pin the 3" side panels lengthwise on the main patterned panel. Sew in place. I would suggest reinforcing this by using a heavier stitch. All seams have 1/2" seam allowance.
Step 4: Cut your end angle. Fold main panel in half once, then again in the opposite direction (so once hot dog, once hamburger). Using your straight edge and rotary cutter, (and making sure you're cutting the ENDS of the fabric) cut your angle, making sure that the folded edge is the long point and the raw edges are the short point. That way your runner will come to a point in the middle of each of the ends.
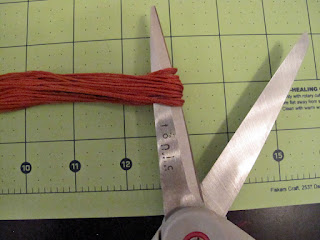
Step 5: Make your tassels. With each pack of embroidery floss, do the following: -Cut ONE end of the floss so that you have one end that is still folded and one end that is all "ends." Remove any short threads...there will be at least one.
-Pull the remaining 6 threads through the loop you have just made and tie another knot at the top of the loop. This will be the section that is attached to the runner end.
-Trim ends if desired
 |
| The part of the tassel you see is the 6 strands that are the attaching point, NOT the main body of the tassel |
Step 7: Trim back panel to match front (and vice versa if needed). I had to trim the back panel for the angles, and the front panel so that all raw edges were even.
Step 8: Sew around perimeter of runner, leaving one side of one pointed end open for turning. Trim tassel ends so that about 1" is still inside the runner once turned.
Step 9: Press all edges. Turn the edge you left open inward 1/2", press and pin in place. Top stitch around entire perimeter of runner.
You're done! You can use this tutorial to make a simple runner at any length you desire. Enjoy!


No comments:
Post a Comment